How to Format a Laptop Windows 7/8/10 with or without CD/USB
Formatting is the first thought that comes to the mind for many people when there is a serious problem in their PC, such as virus attack or extremely slow running speed. It is surely also necessary to format a laptop when you want to sell out your device to avoid privacy crisis. We have talked about how to reset Mac. In this article, we are going to introduce several methods to format a Windows 7/10 laptop with or without deleting all the files.

Method 1. How to Format a Laptop Windows 10 in Settings
In Windows 10, everything is easier than that in the previous operating systems. We can format a Windows 10 laptop with no need of additional devices.
- Step 1. Press Windows key on the keyboard, then click the gear icon to open Settings.
- Step 2. Go to Update & Security, then click Recovery in the left pane.
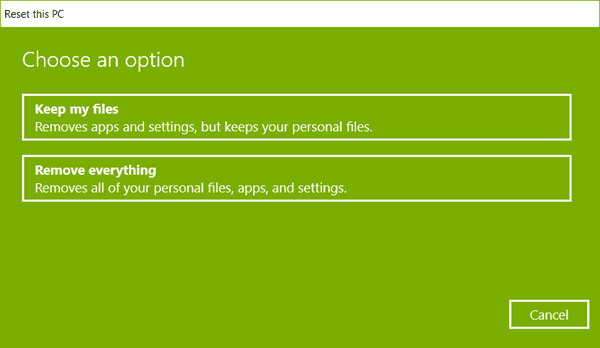
- Step 3. Click Get started button under Reset this PC, and you will see two options as below:

- Step 4. Choose Keep my files or Remove everything according to your needs.
- Step 5. Complete the formatting process. You will be asked whether to remove your files or remove files and clean the drive, the latter of which is time-consuming but will wipe everything clearly.
Method 2. How to Format a Laptop Windows 7 Using System Repair Disc
In Windows 7, users can repair the system by making a repair disc which requires a CD to load, so this method doesn’t work for laptops that don’t have a CD/DVD drive.
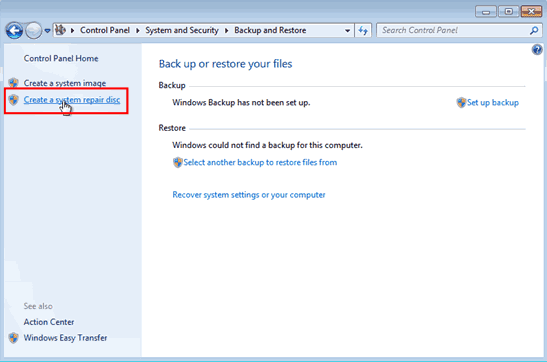
- Step 1. Go to Control Panel > Backup and Restore > Create a system repair disc.
- Step 2. Insert your CD to the laptop and click Create disc, then click Close > OK.

- Step 3. When your computer reboots, repeatedly press F10 or F12 to enter the boot menu.
- Step 4. Select SD as boot device, hit Enter > Next, then choose Use recovery tools that can help fix problems starting Windows.
- Step 5. Click Next and Command Prompt, type Format c:/fs:NTFS to start formatting your laptop.
Method 3. Format a Laptop Windows 7/10 with Windows Installation USB
If your laptop doesn’t have a CD/DVD drive, then you can try to format your Windows 10/7 laptop with a Windows Installation USB. In this case, you need a USB flash drive and create a bootable USB drive.
- Step 1. Power on your laptop and press Delete (or specific button) to enter the BIOS.
- Step 2. Select Advanced BIOS Features, then change the First Boot Device to Removable Device. Press Y to save and exit setup.
- Step 3. Insert the Windows Installation USB to your laptop and restart.
- Step 4. Now you can reinstall the OS or just format the laptop according to the Windows Installation USB.
Method 4. Format a Windows Laptop without Windows Installation USB
- Step 1. Power on your computer and repeatedly press F8 or F11 before the system loads.
- Step 2. Click Next to enter System Recovery. If you have backed up the data, you can choose Destructive Recovery to get a brand-new OS.
- Step 3. Wait the utility to complete the formatting and restart your laptop.
Important: You will lose all the files in the formatted hard drive after formatting your laptop. In case you don’t have any backup, please use iReparo PC Data Recovery to recover files after reinstalling system.
Bottom Line
In this tutorial, we have learnt 4 methods to format a laptop with Windows 7/8/10 operating system. It is important back up the hard drive data before the formatting. If you must format the laptop to make it work again, it is also possible to recover the formatted data with the solution mentioned above. If you have reinstalled the OS of your laptop, you may need to activate Windows 7 manually. Please feel free to tell us if you have any questions or suggestions in the comment.


